Making Basic 3-Inch Plastic Ball Shells
Maybe you've never made an aerial fireworks shell before. Or perhaps you are just stepping up in size to 3-inch shells for the first time. Or perhaps you've just finished a batch of stars and you can't wait to see what they look like in the air. This is a simple project which will show you how to quickly assemble, finish, and fire basic 3-inch plastic-casing aerial ball shells that really work well.

3-Inch, Plastic Ball Shell Bursts
Once the following step-by-step process is mastered, and especially if an assembly-line of shells is set up, each shell will only take about a half-hour to complete.

Cross-Section of 3-Inch Plastic Ball Shell
It is important to know how fast your time fuse burns. This information is used to determine how much of it to use in order to produce the desired time delay. Different batches or brands of time fuse burn at significantly different speeds. Time fuse burn rate can vary from 2 seconds to over 3 seconds per inch.
A 1-inch length of your time fuse should be burned and timed with a stop watch. In that way, the number of seconds of delay-per-inch can be determined. The coil of fuse should be labeled with a tag which indicates its delay in seconds-per-inch. The sample shown in the video below burned at a rate of 2.3 seconds per inch.
In the test shown below, a 1.5-inch piece of fuse was cut, and one end was sliced 1/2-inch deep, and cross matched. Only the burn of the remaining 1 inch of time fuse was timed.
A block of wood with a 1/4-inch hole drilled in it about 1/2-inch deep makes a nice support for the time fuse as it is being sliced and cross matched.
Splitting and Cross Matching 1/4-Inch Time Fuse
To prepare a piece of time fuse for testing, cut a 1-1/2-inch piece of the 1/4-inch time fuse using a razor blade or razor-anvil cutters. Insert one end of the fuse into the hole in the block of wood.
Use a new, sharp, single-edge razor blade to slice the fuse in half, straight down its center, for 1/2-inch. That is the width of the blade between its sharp edge and its ribbed handle. Gently spread the time fuse halves apart slightly, exposing the black powder fuse core.
Cut a 6-inch piece of thin black match with the razor blade or anvil cutters. The match can be harvested from multi-strand quick match, or from paper-wrapped fast fuse.
Insert the black match into the split time fuse, with about 1 inch of the match sticking out one side of the split, and 5 inches sticking out the other.
Using thin string, tie the halves of the time fuse tightly back together just above the cross match. Use a clove hitch secured with an overhand knot.
Secure the test fuse outdoors, and light the longer end of the black match cross match. Timing starts when the cross match burns into the core of the time fuse. Timing ends when the spit of flame appears at the end of the time fuse which is one inch away from the cross match (the left end as seen in the video below). That is the seconds-per-inch burn rate of that particular coil of time fuse.
Testing Burn rate of 1/4-Inch Time Fuse
One way is to simply seal the small air escape holes in the equator with glue after your shell halves have been joined, glued, and dried.
Here's another way: a small vent hole is drilled in the top shell casing hemisphere, inside the recess where the lift-hook will be installed. This process is demonstrated in the following video.
Drilling 1/16-Inch Vent Hole in Top Shell Casing Hemisphere
3 to 3.5 seconds (not length) of time fuse is a good delay from lift to burst for these shells.
Hot-Gluing Time Fuse into Shell Casing
Using a Sharpie, make a mark on the time fuse 3/4-inch from the un-cross matched end.
Pierce one corner of a plastic baggie with an awl or ball-point pen. From the inside of the baggie, push the un-cross matched end of the time fuse through the hole. Pull the baggie all the way up the time fuse to the fuse cross matching.
Observing hot-gluing safety, put a ring of hot-glue around the time fuse at the mark you made 3/4-inch from the un-cross matched end. From the inside of the bottom shell casing, quickly insert the un-cross-matched end of the fuse through the hole in the bottom of the hemisphere. Push the fuse through the casing until the mark is just visible on the outside of the casing and allow the glue to stiffen holding the time fuse in place.
Put a ring of hot-glue around the time fuse area on the outside of the casing, and press the fuse washer over the time fuse and into the glue, attaching it to the casing. Fill the void between the washer and the fuse with hot-glue, creating a nice, fireproof seal.
Pull the sides of the baggie up straight, and cut off the folded-over excess baggie parts with a pair of scissors as shown in the video.
Filling and Closing Shell Casing
During this process, only have the minimum amounts of stars and black powder out and exposed on the workbench. Each time you're done working with those components, close their containers and put them aside out of harm's way.
Push the plastic baggie down inside the hemi to the bottom of the time fuse. Measure out a flat 1/4-cup of stars and put them in the plastic bag in the lower hemi. This should just fill the lower hemi. Weigh out 1.25 ounces of black powder burst, and add half of it to the filled hemi. Tap the hemi to settle the BP in between the stars.
Now measure another flat 1/4-cup of stars and dump them into the plastic baggie. Mould that top section of star-filled baggie into a rounded shape, and add the rest of the BP burst to those stars.
Close the container of stars and set it aside in a safe place.
While holding the bagged stars and burst in a rounded shape, twist the baggie closed on top of its contents. Form as rounded a shape as possible, and put the top hemi onto the twisted-shut baggie.
Press the two hemi's together. While pressing tap on the shell casings to settle the contents. Push any protruding bits of the baggie inside through the equatorial gap with an awl or similar object. Keep tapping and pressing down on the hemi. The combination of these actions will eventually close the shell casing completely. If necessary, several stars may be removed so that the shell can be completely closed.
Gluing and Taping the Shell Closed
Do this next gluing step outdoors or in a well ventilated area, and do not allow the fumes to accumulate near sources of flame or sparks.
Wearing nitrile gloves, pinch the temporarily closed shell casing gently, to open the equator back up, and carefully remove the upper casing hemisphere. Try not to disturb the plastic baggie and stars any more than necessary.
Using the glue applicator, apply PVC pipe cement onto the equatorial casing joints on both halves of the plastic shell casing. Make sure to get all the mating surfaces evenly coated.
Put the top casing half back on the shell and push it back in place. Twist the shell casing back together nice and tightly, until you see glue and softened casing-plastic squeezing out of the joint. Wipe any excess glue off with a paper towel.
Seal the equator with overlapping strips of masking tape applied across the seam. Or clamp the shell shut with enough pressure to keep the two halves joined tightly. This will prevent the shell from springing back open.
Note: This is where the drilled vent hole in the top casing becomes important. It allows air to escape from inside the shell as the casing is closed and glued. Without that hole, the trapped, pressurized air would try to escape out of the equator, potentially leaving air gaps in the glued joint.
But even if you forget to drill the hole or prefer not to, you can always seal the equatorial air holes with glue. Here's the procedure. After you glue the joined shell halves together, use any kind of clamp to keep them tightly joined for 30 minutes. After the shell dries, remove it from the clamp, and examine the equator. Normally, you will see minute spots where there are gaps. Dab some glue on all of the gaps, and allow to dry.
Scotch® 2-Inch-Wide Strapping Tape
The simplest way to reinforce the casing is with bands of strapping tape, which has fiberglass fibers in it. The most widely available strapping tape I can find nowadays is the 2-inch-wide Scotch® strapping tape available in the office-supplies sections of grocery stores, and the big-box department stores. Narrower tape will work, of course, if you find it.
Remove the plastic dispenser from the roll of tape. Using a pair of scissors, split the end of the tape into four equal 1/2-inch-wide strips of tape. The tape will tear neatly between the filaments of fiberglass at those splits when it is dispensed.

End of Tape Marked for Splitting
Put a 1/2-inch-wide band of the tape, three layers thick, around the equator of the shell.

First Band of Tape (3 Layers Thick) at Shell's Equator
Put a second band of the tape, also 3 layers thick, going from one side of the leader-hook-receptacle on the top of the shell, to the other side of the fuse assembly on the bottom of the shell, as shown in the photo below.

Second Band of Strapping Tape
Rotate the shell one-third turn (120-degrees) as shown in the video above. Apply the third band of the tape, once again going from one side of the top shell projection, to the other side of the bottom fuse assembly, as shown below.

Third Band of Strapping Tape Applied
The fourth and final band of the tape is applied in the same way, with the shell rotated another one-third turn. The three vertical bands of tape now form a triangle around the leader-hook projection, and also around the fuse assembly, as shown below.

Fourth and Final Band of Strapping Tape Applied to the Shell
Leader-Hook Glued into its Shell Receptacle
Apply a little of the PVC cement to the base of the leader hook, and install it into its receptacle at the top of the shell. In doing so, make sure that the drilled vent-hole is solidly sealed.
Good glue seals
Cross Matched Exterior End of Time Fuse
Just as was done with the interior end of the time fuse, but using two 1-inch pieces of the thin black match, split, cross match, and tie the exterior end of the time fuse.
Assembled Shell Leader and Lift Cup
Weigh out the black powder lift charge, which will be between 3/4 and 1 ounce for a 3-inch shell, depending on the power of your black powder. These plastic shells are a loose fit in standard 3-inch mortars, so 1 ounce of lift powder for them is a good idea.
Put that lift powder into one of the 5-ounce waxed paper cups.
Measure and cut 20 inches of your leader material, either quick match or paper-wrapped fast fuse. A standard 3-inch mortar will measure about 17 inches long inside it, so the leader length will be long enough to get the top of the shell leader up and out of the top of the gun. In any case, the leader material should be 3 inches longer than the inside length of the mortar you plan to use.
Cut a 4 inch piece of visco ignition fuse. Lap 1 inch of that visco fuse alongside one end of the shell leader black match, and tape the visco fuse securely in that location.
If you are using paper-wrapped fast fuse as leader material, wrap that fuse with masking tape, except for 1.5 inches at the end opposite the visco fused end. This tape-wrap spark-proofs the leader, and also makes it moisture resistant.
Bare 1.5 inches of the black match at the end of the leader, and insert that bared match down into the lift black powder in the paper cup. Use a piece of masking tape to attach the leader to the inside wall of the paper cup.
While observing the hot-glue gun safety tips, put a ring of hot glue around the top edge of the paper cup. Place the shell on top of the cup, with the time fuse pointed straight down.
Apply more hot glue at the joint between the shell and the cup to secure the lift cup in place.
Thread the shell leader up through the leader hook. Verify that the shell can be suspended from the visco ignition fuse without any of the fuses coming apart or disengaging from the shell.
Now, you may wish to use a Sharpie marker to label the shell with its effect for future reference.

Completed Shell, with Leader and Lift-Cup Installed

Verifying the Shell's Fit in a Mortar
The last thing to do now is to verify that the shell fits nicely into the mortar from which it is to be fired.
The mortar will, of course, have to be firmly supported by a stake or rack prior to loading and actually firing the shell. When that is accomplished, however -- Fire in the hole!

Very Nice Shell Bursts Using this Construction Method
3-Inch, Plastic Ball Shell Bursts
Once the following step-by-step process is mastered, and especially if an assembly-line of shells is set up, each shell will only take about a half-hour to complete.
Cross-Section of a 3-Inch Plastic Ball Shell
Cross-Section of 3-Inch Plastic Ball Shell
Preparations
Materials List
-
3-Inch plastic shell-casing set

- PVC plumbing cement
- Q-Tip applicators for cement

PVC Plumbing-Pipe Cement and Q-Tip Applicators
Warning: This cement produces flammable and obnoxious fumes when it is being used and drying. Use it in a well ventilated area, and don't breathe more of the fumes than necessary. The use of a fumes-rated respirator is a good idea.
- Fuse

Fuses Used in Shell Construction -
Note: A 4-inch length of 3/32" visco safety fuse (not shown) will be used to ignite each shell leader.
-
Note: Quick match is not shippable. So, some folks have access to it, and others do not. But, the paper-wrapped fast fuse is easily converted to quick match for use as a shell leader, as will be demonstrated.
- String
- Strong, thin string, made out of a natural fiber such as cotton, flax, jute, or linen will be used. 6_ply cotton string can be purchased online at Office World.
- Single-edge razor blades (available in Home Depot paint department)
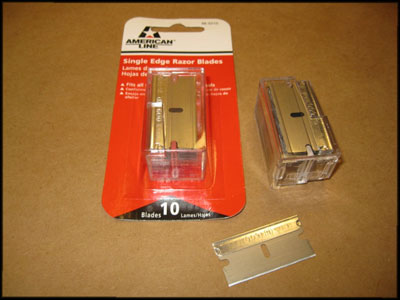
Single-Edge Razor Blades - Hot glue
- Hot glue and a hot-glue gun will be used during the construction of these shells.
-
Warning: Hot-glue guns have been known to short out and spark during use. It is important to use a quality glue gun, and it is a very good idea to keep the glue gun housed on a stand, or in a container, which keeps the gun upright, and not lying in excess glue. It is also a very good safety precaution to keep the gun plugged into a switched power-strip, so the switch can be turned off when the gun is being used around live pyrotechnic materials. See this Hot Glue Gun Safety tutorial for details on these safety measures. They CAN save your life.
- Fold-and-close sandwich baggies (not the heavier zip-lock type).

Fold-and-Close Sandwich Baggies - 1-inch-wide masking tape
- 5-ounce waxed paper cups (to use as lift cups)
- Stars
- Fireworks stars will be used in this project. Approximately four ounces of stars will be used in each shell. Stars that are about 5/16-inch in diameter are recommended for 3-inch shells. But there's no "rule" for star size vs. shell size. Feel free to make yours smaller or larger according to your goals and tastes.
- For simple, quick, and brilliantly colored stars, see the rubber fireworks stars projects. The first project teaches a novel technique for rapidly producing ready-to-use brilliant red stars, and the second project applies the same technique to a rainbow of star colors. At the same time these stars are being made, an optional rising-comet-tail for the outside of the shell can also be made. This tail will display as the shell ascends in the air, prior to the shell's burst.
- Burst powder, and lift powder for aerial shells
- Granulated black powder, either commercial or homemade, will be used to lift and burst these shells. Here are two projects to make high quality black powder: Red Gum Black Powder and Ball Milled Black Powder. Black powder of a medium granulation should be used--such as FFg, Fg, 4FA or Cannon Grade--to allow fire transfer within the shell. Approximately two ounces of BP will be used for the lift and burst powder in each shell.

Commercial Goex Black Powder
Note: Black powder substitutes like Triple Seven® or Pyrodex® will not work to lift shells.
Some sporting goods stores may still stock Goex sporting black powder. My local Bass Pro shop still does. It can also be ordered online, by adults, delivered with Hazmat shipping. One source is Graf and Sons. I hear their Graf-brand black powder is very nice stuff, too.
- A pair of scissors, and Sears razor-anvil cutters (for cutting fuse, which can also be done with the razor blade)
- A mortar tube and a secure support for it will be required for the safe launching of the shells.
- Miscellaneous tools and supplies: nitrile gloves, leather glove, drill and 1/16" drill bit, paper towels, a couple of short sections of tube to use as shell stands (one long enough to support the bottom fused hemisphere without damaging the time fuse), weighing-scale, Sharpie marker, an awl, etc.
Determining the Burn Rate of the Time Fuse
To create a time-delay between the shell's lift and burst, 1/4-inch time fuse is used. When the time fuse is installed, it will be cross matched with pieces of thin black match. These can be harvested from flat quick match, or from the fast fuse.It is important to know how fast your time fuse burns. This information is used to determine how much of it to use in order to produce the desired time delay. Different batches or brands of time fuse burn at significantly different speeds. Time fuse burn rate can vary from 2 seconds to over 3 seconds per inch.
A 1-inch length of your time fuse should be burned and timed with a stop watch. In that way, the number of seconds of delay-per-inch can be determined. The coil of fuse should be labeled with a tag which indicates its delay in seconds-per-inch. The sample shown in the video below burned at a rate of 2.3 seconds per inch.
In the test shown below, a 1.5-inch piece of fuse was cut, and one end was sliced 1/2-inch deep, and cross matched. Only the burn of the remaining 1 inch of time fuse was timed.
A block of wood with a 1/4-inch hole drilled in it about 1/2-inch deep makes a nice support for the time fuse as it is being sliced and cross matched.
Splitting and Cross Matching 1/4-Inch Time Fuse
To prepare a piece of time fuse for testing, cut a 1-1/2-inch piece of the 1/4-inch time fuse using a razor blade or razor-anvil cutters. Insert one end of the fuse into the hole in the block of wood.
Use a new, sharp, single-edge razor blade to slice the fuse in half, straight down its center, for 1/2-inch. That is the width of the blade between its sharp edge and its ribbed handle. Gently spread the time fuse halves apart slightly, exposing the black powder fuse core.
Cut a 6-inch piece of thin black match with the razor blade or anvil cutters. The match can be harvested from multi-strand quick match, or from paper-wrapped fast fuse.
Insert the black match into the split time fuse, with about 1 inch of the match sticking out one side of the split, and 5 inches sticking out the other.
Using thin string, tie the halves of the time fuse tightly back together just above the cross match. Use a clove hitch secured with an overhand knot.
Secure the test fuse outdoors, and light the longer end of the black match cross match. Timing starts when the cross match burns into the core of the time fuse. Timing ends when the spit of flame appears at the end of the time fuse which is one inch away from the cross match (the left end as seen in the video below). That is the seconds-per-inch burn rate of that particular coil of time fuse.
Testing Burn rate of 1/4-Inch Time Fuse
Safety Precautions
- Please read these fireworks safety essays and refresh your safety consciousness.
- Wear eye protection when practicing this hobby.
- Wear cotton clothing with long pants and sleeves.
- Always minimize the exposure of explosive or flammable "stuff."
- Keep a bucket of cold water handy to the work area in case of burns.
- Make sure you have easy egress from the work area in case of emergency.
- Study the hot-glue safety essay, and put those precautions into practice.
- Only cut fuse with a razor blade or a razor-anvil cutter to prevent accidental ignition. Do not use scissors.
- Store your flammable compounds, components and devices in a safe storage container.
- Practice safe display practices when firing aerial shells and other devices.
Assembling the Shell
Drilling Vent Hole in Top Shell Casing Hemisphere
If the shell casing has no way to vent air when it is glued and closed, the pressurized trapped air can force its way out through the glued equator. As it does so it creates gaps in that glue seal. This can allow hot lift gasses to get into the shell when it is launched, causing a "flowerpot" shell failure. Here are two ways to prevent that problem.One way is to simply seal the small air escape holes in the equator with glue after your shell halves have been joined, glued, and dried.
Here's another way: a small vent hole is drilled in the top shell casing hemisphere, inside the recess where the lift-hook will be installed. This process is demonstrated in the following video.
Drilling 1/16-Inch Vent Hole in Top Shell Casing Hemisphere
Cutting Time Fuse and Cross Matching One End
Note: Now is a good time to get your hot-glue gun heating up, following the hot-gluing safety tips.3 to 3.5 seconds (not length) of time fuse is a good delay from lift to burst for these shells.
- Determine the length of your time fuse which will provide that amount of delay (based on your time fuse burn rate test). For example, in the case of my fuse, which burns at a rate of 2.3 seconds-per-inch, I want 1.5 inches of fuse for the timing (1.5 inches of fuse X 2.3 seconds per inch = 3.45 seconds of delay).
- To that length, add one extra inch. Using my fuse (your fuse may burn at a different rate), 1.5 inches for timing plus the extra 1 inch gives me a total required length of 2.5 inches of fuse.
- Then using a razor blade or razor-anvil cutters, cut a piece of your time fuse to the correct, calculated length.
Hot-Gluing Time Fuse into Bottom Shell Casing
Hot-Gluing Time Fuse into Shell Casing
Using a Sharpie, make a mark on the time fuse 3/4-inch from the un-cross matched end.
Pierce one corner of a plastic baggie with an awl or ball-point pen. From the inside of the baggie, push the un-cross matched end of the time fuse through the hole. Pull the baggie all the way up the time fuse to the fuse cross matching.
Observing hot-gluing safety, put a ring of hot-glue around the time fuse at the mark you made 3/4-inch from the un-cross matched end. From the inside of the bottom shell casing, quickly insert the un-cross-matched end of the fuse through the hole in the bottom of the hemisphere. Push the fuse through the casing until the mark is just visible on the outside of the casing and allow the glue to stiffen holding the time fuse in place.
Put a ring of hot-glue around the time fuse area on the outside of the casing, and press the fuse washer over the time fuse and into the glue, attaching it to the casing. Fill the void between the washer and the fuse with hot-glue, creating a nice, fireproof seal.
Pull the sides of the baggie up straight, and cut off the folded-over excess baggie parts with a pair of scissors as shown in the video.
Filling the Shell with Stars and Burst Powder
Filling and Closing Shell Casing
During this process, only have the minimum amounts of stars and black powder out and exposed on the workbench. Each time you're done working with those components, close their containers and put them aside out of harm's way.
Push the plastic baggie down inside the hemi to the bottom of the time fuse. Measure out a flat 1/4-cup of stars and put them in the plastic bag in the lower hemi. This should just fill the lower hemi. Weigh out 1.25 ounces of black powder burst, and add half of it to the filled hemi. Tap the hemi to settle the BP in between the stars.
Now measure another flat 1/4-cup of stars and dump them into the plastic baggie. Mould that top section of star-filled baggie into a rounded shape, and add the rest of the BP burst to those stars.
Close the container of stars and set it aside in a safe place.
While holding the bagged stars and burst in a rounded shape, twist the baggie closed on top of its contents. Form as rounded a shape as possible, and put the top hemi onto the twisted-shut baggie.
Press the two hemi's together. While pressing tap on the shell casings to settle the contents. Push any protruding bits of the baggie inside through the equatorial gap with an awl or similar object. Keep tapping and pressing down on the hemi. The combination of these actions will eventually close the shell casing completely. If necessary, several stars may be removed so that the shell can be completely closed.
Gluing Shell Casing Closed
Gluing and Taping the Shell Closed
Do this next gluing step outdoors or in a well ventilated area, and do not allow the fumes to accumulate near sources of flame or sparks.
Wearing nitrile gloves, pinch the temporarily closed shell casing gently, to open the equator back up, and carefully remove the upper casing hemisphere. Try not to disturb the plastic baggie and stars any more than necessary.
Using the glue applicator, apply PVC pipe cement onto the equatorial casing joints on both halves of the plastic shell casing. Make sure to get all the mating surfaces evenly coated.
Put the top casing half back on the shell and push it back in place. Twist the shell casing back together nice and tightly, until you see glue and softened casing-plastic squeezing out of the joint. Wipe any excess glue off with a paper towel.
Seal the equator with overlapping strips of masking tape applied across the seam. Or clamp the shell shut with enough pressure to keep the two halves joined tightly. This will prevent the shell from springing back open.
Note: This is where the drilled vent hole in the top casing becomes important. It allows air to escape from inside the shell as the casing is closed and glued. Without that hole, the trapped, pressurized air would try to escape out of the equator, potentially leaving air gaps in the glued joint.
But even if you forget to drill the hole or prefer not to, you can always seal the equatorial air holes with glue. Here's the procedure. After you glue the joined shell halves together, use any kind of clamp to keep them tightly joined for 30 minutes. After the shell dries, remove it from the clamp, and examine the equator. Normally, you will see minute spots where there are gaps. Dab some glue on all of the gaps, and allow to dry.
Reinforcing the Shell Casing with Bands of Strapping Tape
If the plastic shell casing is not reinforced, it can simply pop open at the equator when the shell bursts, and the starburst will be weak and uneven. Reinforcing tape can actually increase the radius of your shell burst, making the effect appear bigger in the sky.The simplest way to reinforce the casing is with bands of strapping tape, which has fiberglass fibers in it. The most widely available strapping tape I can find nowadays is the 2-inch-wide Scotch® strapping tape available in the office-supplies sections of grocery stores, and the big-box department stores. Narrower tape will work, of course, if you find it.
Remove the plastic dispenser from the roll of tape. Using a pair of scissors, split the end of the tape into four equal 1/2-inch-wide strips of tape. The tape will tear neatly between the filaments of fiberglass at those splits when it is dispensed.
End of Tape Marked for Splitting
Put a 1/2-inch-wide band of the tape, three layers thick, around the equator of the shell.
First Band of Tape (3 Layers Thick) at Shell's Equator
Put a second band of the tape, also 3 layers thick, going from one side of the leader-hook-receptacle on the top of the shell, to the other side of the fuse assembly on the bottom of the shell, as shown in the photo below.
Second Band of Strapping Tape
Rotate the shell one-third turn (120-degrees) as shown in the video above. Apply the third band of the tape, once again going from one side of the top shell projection, to the other side of the bottom fuse assembly, as shown below.
Third Band of Strapping Tape Applied
The fourth and final band of the tape is applied in the same way, with the shell rotated another one-third turn. The three vertical bands of tape now form a triangle around the leader-hook projection, and also around the fuse assembly, as shown below.
Fourth and Final Band of Strapping Tape Applied to the Shell
Install the Leader Hook into its Receptacle in the Shell Casing
Leader-Hook Glued into its Shell Receptacle
Apply a little of the PVC cement to the base of the leader hook, and install it into its receptacle at the top of the shell. In doing so, make sure that the drilled vent-hole is solidly sealed.
Good glue seals
- to close off the vent hole,
- at the shell's equator and
- at the time fuse entry point
Cross Matching Exterior End of Time Fuse
Cross Matched Exterior End of Time Fuse
Just as was done with the interior end of the time fuse, but using two 1-inch pieces of the thin black match, split, cross match, and tie the exterior end of the time fuse.
Making and Installing Shell Leader and Lift Cup
Assembled Shell Leader and Lift Cup
Weigh out the black powder lift charge, which will be between 3/4 and 1 ounce for a 3-inch shell, depending on the power of your black powder. These plastic shells are a loose fit in standard 3-inch mortars, so 1 ounce of lift powder for them is a good idea.
Put that lift powder into one of the 5-ounce waxed paper cups.
Measure and cut 20 inches of your leader material, either quick match or paper-wrapped fast fuse. A standard 3-inch mortar will measure about 17 inches long inside it, so the leader length will be long enough to get the top of the shell leader up and out of the top of the gun. In any case, the leader material should be 3 inches longer than the inside length of the mortar you plan to use.
Cut a 4 inch piece of visco ignition fuse. Lap 1 inch of that visco fuse alongside one end of the shell leader black match, and tape the visco fuse securely in that location.
If you are using paper-wrapped fast fuse as leader material, wrap that fuse with masking tape, except for 1.5 inches at the end opposite the visco fused end. This tape-wrap spark-proofs the leader, and also makes it moisture resistant.
Bare 1.5 inches of the black match at the end of the leader, and insert that bared match down into the lift black powder in the paper cup. Use a piece of masking tape to attach the leader to the inside wall of the paper cup.
While observing the hot-glue gun safety tips, put a ring of hot glue around the top edge of the paper cup. Place the shell on top of the cup, with the time fuse pointed straight down.
Apply more hot glue at the joint between the shell and the cup to secure the lift cup in place.
Thread the shell leader up through the leader hook. Verify that the shell can be suspended from the visco ignition fuse without any of the fuses coming apart or disengaging from the shell.
Now, you may wish to use a Sharpie marker to label the shell with its effect for future reference.
Completed Shell, with Leader and Lift-Cup Installed
We're Almost Done
Be Sure the Shell Fits in the Mortar
Verifying the Shell's Fit in a Mortar
The last thing to do now is to verify that the shell fits nicely into the mortar from which it is to be fired.
The mortar will, of course, have to be firmly supported by a stake or rack prior to loading and actually firing the shell. When that is accomplished, however -- Fire in the hole!
Very Nice Shell Bursts Using this Construction Method