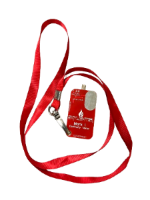
Skylighter
Over 750 Products for Making Fireworks & Pyrotechnics
  Your Cart | Login | Customer Service

Friendly Service Since 1995
(540) 338-3877 - 9:00AM to 5:00PM (Mon-Fri) ET
1 Year, Risk-Free, Money-Back Guarantee

 Home | Order Status | Free Newsletter | Age Check | Blog
Search: for

How To Use Wireless Electric Firing System GN6020


Instructions for Using
12 Cue Remote Control Electrical Firing System
(#GN6020)


INTRODUCTION


Your Remote Control Firing System is an electrical ignition system used to control and fire pyrotechnic devices, primarily in fireworks displays. It can be used either indoors or outdoors. It can fire more than one electric match at one time if they are wired in series.

Your system consists of three parts:
  • The Field Module
  • The Remote Control
  • The 110 volt AC adapter for the Field Module


Figure 1. Field Module (black) and Remote Control (white), (AC Adaptor not shown)


It is a very simple system to use. To fire any fireworks using this electrical firing system, you need:
  • A fireworks device
  • One or more electric matches (ematches)
  • Shooting wire, optional (sometimes called zip or scab wire)
  • The Field Module
  • The Remote Control
  • You might find it handy to have some wire cutters and strippers and a roll of masking tape as well. We also recommend you use Skylighter’s Ematch Tester (#GN5005) to be sure each electric match will work, before using them.


HOW TO USE THE SYSTEM:


Put a new battery in the Remote Control. First, remove your Remote Control from the Field Module. It's stored in a compartment in the bottom of the Field Module next to the batteries. Check your Remote Control and make sure it has a fresh battery in it. We recommend changing to a new battery every time you are going to fire a display.

Programming remotes. This firing system has the option of using two remotes to fire the same firing system. You do not need to program your remote to use it with the firing system, however if you have two remotes you'd like to use this is how you program both remotes to fire the same system:

Programming Instructions:

  1. Turn the Safety Switch Key to the ON position.
  2. Turn the Function Selection Switch to the FIRE position.
  3. Hold the Study button down until the white LED beside it (signal light) goes out.
  4. Turn the Function Selection switch to the middle (OFF) position. This cancels all frequencies previously programmed into the unit.
  5. Turn the Function Selection switch to the FIRE position.
  6. Push the STUDY button and release it. The LED should blink red once.
  7. Turn your first remote control(transmitter) on using the ON/Off switch on the side. Push one of the firing buttons on the remote. The white LED should blink twice.
  8. Push the STUDY button and release it again. The white LED should blink once.
  9. Turn your second remote control (transmitter) on using the ON/Off switch on the side. Push one of the firing buttons on the remote. The LED should blink white twice.
  10. Turn the Function Selection switch to the middle (OFF) position.
Turn the Remote Off. Hold the Remote Control in your hand with the buttons facing up, so you can read them.


Figure 2. Remote Control


On the right side is a small black slider switch. This is the Safety Switch for the Remote. Slide the switch to the "OFF" position.


Figure 3. Remote Control Safety Switch in Off Position


This turns the Remote off, and will prevent it from accidentally firing anything before you want it to.
WARNING!
Do not turn the Remote Control on until you are ready to actually fire your devices.


Put new batteries in the Field Module. Check your Field Module, and make sure it has 9 fresh 1.5 volt batteries. (Batteries are not necessary if you will be using the 110-volt AC adaptor.) We recommend using new batteries every time you fire a display. Verify you have power by turning the key switch to On.


Figure 4. Turn Field Module key switch to the right to “On”


Then set the rocker switch to the Test position. Then rock the switch to the Fire position.
A red light should come on for the Fire position and a blue light should come on for the Test position.


Figure 5. Make sure “Fire” and “Test” lights come on


If “Fire” and “Test” lights don’t come on, check your batteries or your AC adaptor or power cord connection. NOTE: If both “Test” and “Fire” lights appear to be dim, then one or more batteries may be weak. You should replace the batteries. If one light comes on and the other doesn’t, contact Skylighter.

If you have power, turn the key switch back to Off.

Connect ematches to fireworks. You use your system by first connecting an ematch to your firework (either to the fuse or elsewhere).

This system is ideally suited for firing “fronts.” A front is typically a line of similar fireworks devices (shells, comets, mines, etc.) fired at the same time. However, any combination of single or multiple series electric matches may be fired. It is also great for firing consumer fireworks displays on July 4th or at other times.

Connect ematches to Field Module. You then run the two wires (also called leads, or lead wires) from your ematch to one of the positions (1 through 12) on the Field Module. Connect both wires from each match to the clips.


Figure 6. Ematch wires connected to Field Module cue #1


It does not matter which wire goes into which colored clip. Your system enables you to attach fireworks devices to as many as 12 different firing positions, called “cues.” Each cue on your Field Module corresponds to numbers 1 through 12 on your Remote Control. When you fire number 1 on your Remote Control, it ignites whatever is attached to cue number 1 on the Field Module. Any cue can fire one or more electric matches at the same time, as long as they are connected together in series. For instance, you can launch one aerial shell using one match. Or, you can launch as many as 6 shells with the push of a single button, by ematching them in series. To fire more than one ematch per cue, simply wire your fireworks together in one series circuit (see Figure 7). No matter how many ematches you connect in a series circuit, you will be with only two wires unconnected. Connect these two wires to one cue on your Field Module.


Figure 7. Ematches wired “in series”


Contrary to what you may think, when the first ematch in a series fires, it will not break the circuit for the rest of the series. If the whole series has continuity (see next paragraph) before firing, all devices will fire when you press the numbered button on your Remote Control.

Check continuity on Field Module. Once all ematched fireworks are connected to the Field Module, check the continuity of your circuits. This verifies that each of your ematches will receive the electrical pulse when you are ready to fire. Your Field Module has a built-in continuity tester, so you can check the integrity of each of the 10 firing circuits to be sure that all circuits are complete and ready to fire. Do not use ordinary electrical continuity testers. Commercial circuit testers can unintentionally fire the fireworks devices, with possibly catastrophic results. When testing continuity, be sure all people are a safe distance away from the fireworks devices.

To test continuity, turn the key switch to “On.” Then set the rocker switch to “Test.” The red test indication lights at the bootom of the Field Module should come on for each cue connection you have made to the Field Module.


Figure 8. Cues 1-3 Testing Good
(Keyswitch set to “On,” rocker switch set to “Test,” only cues 1, 2, and 3 have devices connected)


If you have made connections to all 12 cues, you should have 12 Test indication lights on. If the Test light does not come on for one or more of your cues, then you have a broken circuit somewhere. This can be caused by any number of problems. See the Troubleshooting section for help in diagnosing and correcting the problem.

If a Test indication light comes on for each cue you are using, then all your circuits are ready to fire. Once tested you can begin firing your display.

NOTE: Continuity testing only tells you if there is a complete circuit, i.e. circuit is not open, not allowing current to flow - not able to fire electric matches. However, a short circuit (for instance, if there is a staple cutting thru the insulation) may test “good”, but will not allow electric matches to fire. Make sure you have good connections (insulated from ground) and not shorted.

If you have problems you cannot resolve, email us at: support@skylighter.com or call us at (540) 338-3877. The Troubleshooting section may help as well.

FIRING YOUR FIREWORKS DEVICES


Once your system is wired and continuity tested, you are ready to fire each device. We recommend you practice this first with either ematches only, or with ematches connected to one or two small fireworks before taking on a whole fireworks show. Get familiar with the way your system works, and the procedures you will need to use when you go “live.” Practice in daylight. It is much easier to troubleshoot when you can see everything laid out.

Steps for shooting

  • Raise the antenna on the Field Module until it's fully extended and in a vertical position.


  • Turn the Field Module keyswitch to On.


  • Press the Field Module rocker switch to the Fire position. The Fire light should come on.


  • Figure 9. Field Module Ready to Fire
    (Keyswitch “On,” rocker switch set to “Fire”)


  • Cover your Field Module with some fireproof material. This will prevent sparks and flaming debris from damaging your system.


  • Walk to the place from which you will fire your show. Visually check and make sure everyone is safely away from your fireworks devices. If you are firing 1.4G (Class C, consumer) devices, this should be at least 140 feet.


  • Extend the antenna on the Remote Control.

  • Slide the black safety switch on the Remote Control to the "ON" position. Your Remote Control and firing system is now ready to fire.


Figure 10. Remote Control Safety Switch Ready to Fire


WARNING: Do not slide the safety switch to the On position until you are actually ready to fire your devices. You can now fire any of the 12 cues one at a time.

To fire, press each numbered button on the Remote Control for about one second or until the firework ignites. Each time you press a numbered button, the red Fire light will come on.


Figure 11. Remote Control When Firing


AFTER YOU FINISH SHOOTING


Set the Remote Control to off. Slide the black safety switch on the Remote Control back to "OFF". Push the Remote Control’s antenna back in.

Turn the Field Module keyswitch off.

Set the Field Module rocker switch to the middle ( o ) position.

Remove the wires from the Field Module.

Wait 30 minutes and check for duds. See if everything fired completely.


© Copyright 2008 Skylighter, Inc.  All Rights Reserved

(540) 338-3877 phone

(540) 338-0968 fax

support@skylighter.com | Contact Us

Skylighter is a proud supporter of the PGI