How to Build a Ball Mill Cabinet for Soundproofing
This article on building a ball mill cabinet, by Ned Gorski, is a side article that goes with the Ball Milling 101 article.
One additional goal is that we want to be able to easily pile sandbags, firewood, buckets of water, buckets of dirt, or the like, around and on top of the mill to barricade it for safety purposes. These three points lead us to a nifty little project for this milling discussion: an insulated cabinet to put the mill into. The cabinet really deadens sound, increases the temperature around the mill and jar, and easily supports any barricading materials that are stacked around and on top of it. You can make this cabinet in a couple of hours.
If you can build a plywood box, you can easily build this cabinet. I start with two pieces of 3/4" birch plywood - 24" x 48", and 4 pieces of half inch thick, suspended ceiling tile - 24" x 24".
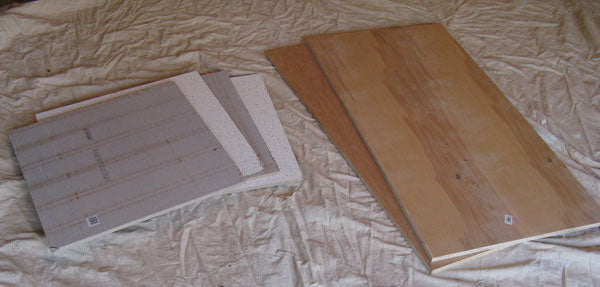
Plywood and Ceiling Tiles
From the plywood, I cut a cabinet bottom - 13.5" x 24", two sides - 16" x 24", two sides - 12" x 16", and a top - 14.5" x 25".
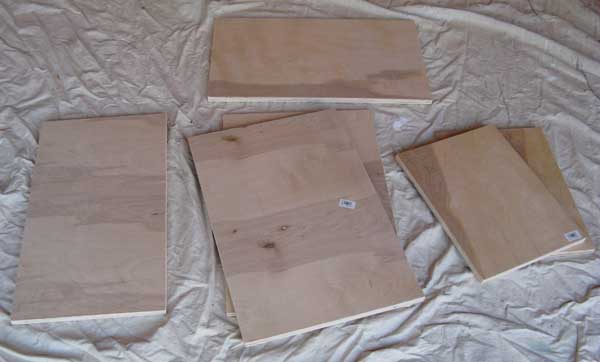
Cabinet Bottom, Sides and Top
Then, I drill some ventilation holes in the sides as shown. I want to be able to allow some air flow through the cabinet so the motor does not overheat.
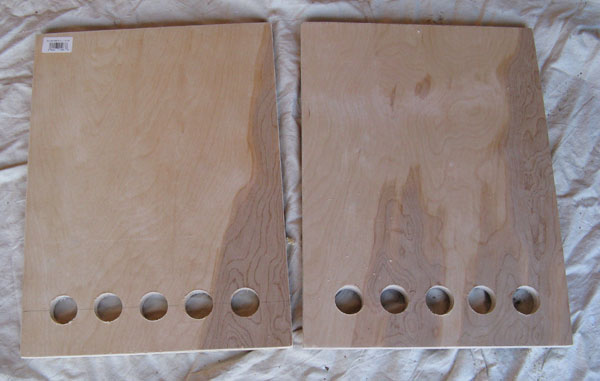
Ventilation Holes Drilled in Cabinet Sides
Then, using Liquid Nails glue, and nails, screws, or a pneumatic stapler, I assemble the bottom and sides. Using more of the glue and a razor knife, I cut and install the ceiling tile insulation in the cabinet on the bottom and sides, and onto the bottom of the lid. Then I extend the ventilation holes through the insulation.

Assembled Box and Glued Tile Insulation
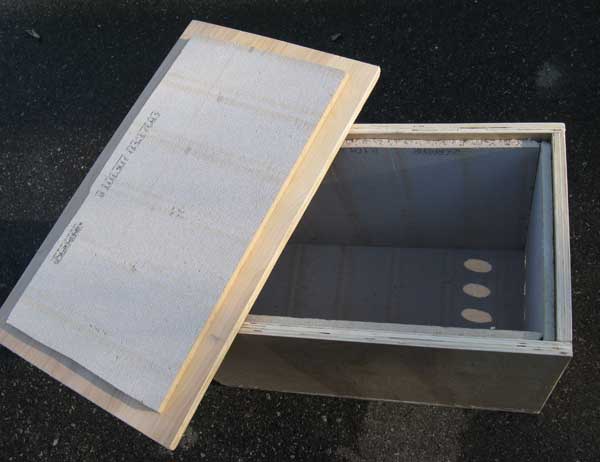
Completed Ball Mill Cabinet
When it is installed, the lid projects 1/2" beyond the sides of the box for easy installation and removal.
Now, the ball mill cord can be fed out of one of the vent holes, and the mill can be installed into the cabinet.
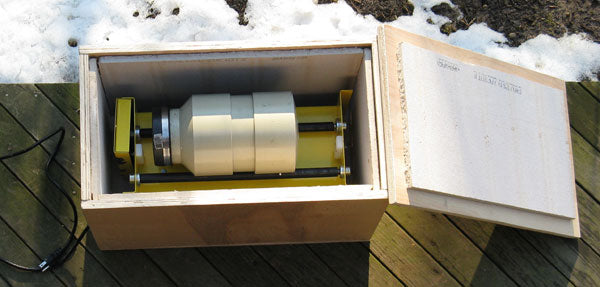
Completed Cabinet and Installed Ball Mill
One nice addition to this assembly is a little thermometer I picket up at Home Depot, placed in the cabinet or attached to the lid. We are shooting for an ideal milling temperature in the range of 70-120 degrees F. If the temperature is checked, it can be adjusted by opening or blocking the side vents, propping the lid open a bit with a block of wood, or the like. (Don't install any temporary blocking in a way that would allow it to drop onto the running mill and jam it--that could cause a fire.) I use this little wireless indoor/outdoor thermometer unit placing the sending unit in the mill cabinet, and the readout unit in my shop.
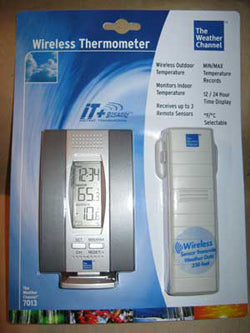
Wireless Thermometer
I have found, as did Lloyd, that the hotter the mill is during operation, the hotter the BP that will result. I also concur with him that at the higher temperatures, the BP mill dust will start to form a solid clump at one end of the jar during milling. The time it takes to get to this point depends on what media is being used.
Lead media can cause this in about 2-3 hours at 90 degrees F. My stainless steel media causes this to occur after only 1 to 1.5 hours of milling. These are typical milling run times with the two types of media.
I try to time my mill runs to stop just as this aggregation begins to happen, because as the powder clumps together, there is less and less of it between the media balls, causing them and the jar to wear much more quickly.
Materials Needed
A Ball Mill Cabinet for Soundproofing
Ball milling can be noisy, especially when PVC jars are used. Those balls clattering around in the jar, over and over, for hours, can get on one's last nerve, even though the mill is a hundred feet away. Another point is that milling efficiency can rise dramatically with temperature of the material being milled. BP made from mill dust milled at 40 degrees F might be only 2/3 as powerful as BP milled at 90 degrees F.One additional goal is that we want to be able to easily pile sandbags, firewood, buckets of water, buckets of dirt, or the like, around and on top of the mill to barricade it for safety purposes. These three points lead us to a nifty little project for this milling discussion: an insulated cabinet to put the mill into. The cabinet really deadens sound, increases the temperature around the mill and jar, and easily supports any barricading materials that are stacked around and on top of it. You can make this cabinet in a couple of hours.
If you can build a plywood box, you can easily build this cabinet. I start with two pieces of 3/4" birch plywood - 24" x 48", and 4 pieces of half inch thick, suspended ceiling tile - 24" x 24".

Plywood and Ceiling Tiles
From the plywood, I cut a cabinet bottom - 13.5" x 24", two sides - 16" x 24", two sides - 12" x 16", and a top - 14.5" x 25".

Cabinet Bottom, Sides and Top
Then, I drill some ventilation holes in the sides as shown. I want to be able to allow some air flow through the cabinet so the motor does not overheat.

Ventilation Holes Drilled in Cabinet Sides
Then, using Liquid Nails glue, and nails, screws, or a pneumatic stapler, I assemble the bottom and sides. Using more of the glue and a razor knife, I cut and install the ceiling tile insulation in the cabinet on the bottom and sides, and onto the bottom of the lid. Then I extend the ventilation holes through the insulation.

Assembled Box and Glued Tile Insulation

Completed Ball Mill Cabinet
When it is installed, the lid projects 1/2" beyond the sides of the box for easy installation and removal.
Now, the ball mill cord can be fed out of one of the vent holes, and the mill can be installed into the cabinet.

Completed Cabinet and Installed Ball Mill
One nice addition to this assembly is a little thermometer I picket up at Home Depot, placed in the cabinet or attached to the lid. We are shooting for an ideal milling temperature in the range of 70-120 degrees F. If the temperature is checked, it can be adjusted by opening or blocking the side vents, propping the lid open a bit with a block of wood, or the like. (Don't install any temporary blocking in a way that would allow it to drop onto the running mill and jam it--that could cause a fire.) I use this little wireless indoor/outdoor thermometer unit placing the sending unit in the mill cabinet, and the readout unit in my shop.

Wireless Thermometer
I have found, as did Lloyd, that the hotter the mill is during operation, the hotter the BP that will result. I also concur with him that at the higher temperatures, the BP mill dust will start to form a solid clump at one end of the jar during milling. The time it takes to get to this point depends on what media is being used.
Lead media can cause this in about 2-3 hours at 90 degrees F. My stainless steel media causes this to occur after only 1 to 1.5 hours of milling. These are typical milling run times with the two types of media.
I try to time my mill runs to stop just as this aggregation begins to happen, because as the powder clumps together, there is less and less of it between the media balls, causing them and the jar to wear much more quickly.
Materials Needed
- Liquid Nails (Glue)
- Nails, screws or pneumatic stapler
- Plywood: 2 pcs. 24x48", 3/4" thick
- Razor knife
- Suspended ceiling tile: 4 pcs. 24x24", 1/2" thick
- Thermometer
