How to Use a Ball Mill Safely and Effectively
I have some lump charcoal that just came out of my retort after I cooked it, and I want to turn it into airfloat charcoal.
Or, the directions say to ball mill my rocket fuel for an hour.
An article tells me to ball mill my star composition prior to pressing my stars.
Maybe I just got some crystalline potassium nitrate that looks like sugar, and I want to turn it into a fine, talc-like powder.
And, perhaps most of all, I want to be able to make commercial-quality, high-performance black powder.
In Volume 1 of Bill Ofca's Technique in Fire, he states that "small particle size is important to good chemical reaction. The smaller the particle size, the greater the specific area, hence the most complete and fastest reaction."
Except for very small batches, ball milling is the best way for the amateur fireworker to reduce particle size in their chemicals. With small batches of individual chemicals, some folks use electric coffee mills to grind the chemicals into fine powder. NEVER grind mixed compositions in a coffee grinder, though. To do so would be to court disaster.

Homemade Double-Barrel Ball Mill
Ball milling replaces potentially unsafe hand grinding of chemicals and compositions. The crushing of the material is accomplished by the repeated falling of heavy balls onto it, over and over, inside the mill jar.
So, it sounds like I need a ball mill. I want my chemicals to have small particle size and be intimately mixed. What are my choices?
I can either get Lloyd's book and build my own ball mill, or I can purchase one. (I'd still recommend getting the book for all of the other valuable milling information contained in it, though.)
Skylighter sells a nice ball mill which comes with a mill jar. All you have to do is add milling media. More on that in just a minute.
I’m also including how-to info for a few other milling accessories that will increase your milling productivity. You can make this yourself: a bucket screen to separate your milled powders from the media; a simple little soundproof cabinet to put your mill in: and weatherproof sandbags for safely barricading the mill.
Here's a ball mill you could get here at Skylighter. This size jar is typically referred to as a 'one gallon jar' because its volume is, indeed, one gallon.

Skylighter's Ball Mill
This jar is constructed of PVC plumbing pipe and fittings per Lloyd’s original instructions.
How many jars or barrels do I need? If one is milling only black powder ("BP") compositions, or the individual chemicals that make them up (potassium nitrate, sulfur, charcoal, dextrin), then only one barrel is necessary.
If I am milling some other chemicals by themselves such as barium nitrate, strontium nitrate, or ammonium perchlorate, then I want a barrel/media combination dedicated to each of those individual chemicals. This prevents cross-contamination between the various chemicals that are milled.
Black powder compositions are the only mixed chemical compositions I mill, and they are never milled with any metals in them. If, say, a charcoal star formula calls for the inclusion of any metal, such as ferro-titanium or titanium, the metal is added to the black powder base composition after it is milled.

Ball Milling Media - .50 Caliber Lead Balls
It took 12 boxes of these 1/2" diameter lead balls (from Bass Pro) to fill the mill jar half full, which is the ideal media "charge" in this1-gallon jar setup. The total weight of the media is 30 pounds.
That is an important note: Fill the mill jar half full of media for optimal milling. If you use less, your milling time will either be longer, or the grinding will be insufficient. The most frequently reported milling problem we hear at Skylighter is from people whose black powder was weak because they did not use enough media.
After I got these lead balls, I ran the mill with them in the jar along with 4 cups of airfloat charcoal I had on hand. This was in order to clean off the oil, grease, and/or wax that came coated on the new balls. Then I threw that batch of charcoal out. I did not want that "crud" to end up in any good chemicals or BP that I milled.
"Well, Ned, we just fill the jar the rest of the way with chemicals on top of the media and turn her on, right?"
"Nope," said Ned.
For efficient milling, the ideal amount of stuff we are grinding, the "material charge," is just enough to fill all the voids between the media and then just a little bit more. This turns out to be an amount of material that fills the empty mill jar 25%, or 1/4 of the volume of the mill jar, after the material has been milled.
Now, in practicality this can be a bit hard to determine. How do I know how much lump charcoal to add to the jar to end up with enough airfloat charcoal to fill one quarter of the jar? How can I tell how much potassium nitrate, charcoal, and sulfur will mill into just the right amount of black powder mill dust?
Trial and error, that's how. I have found that if I put my media in the jar and then add enough of my cooked and crushed lump charcoal to just loosely fill the jar the rest of the way, I will end up with about the right amount of airfloat to fill the voids in the media and cover it by a bit more when the run is done.
It's easy enough to take your empty mill jar and add individual cups of water to it to determine its volume. Then divide that by 4 and that's the amount of, say, potassium nitrate to add to a mill jar run to finely pulverize it. You get the idea. The jar and barrel shown above both have a one-gallon volume which is 16 kitchen measuring cups. So, a milled material charge of 4 cups in volume is what we are shootin' for.
In making black powder, I've found that a material charge of 15 ounces of potassium nitrate, 3 ounces of airfloat charcoal, and 2 ounces of sulfur produces the most efficient quantity of BP mill dust.
The density of the mill dust, and therefore the volume it occupies, will vary a bit with the density of the charcoal used. Pine charcoal is quite a bit less dense, occupying more volume per ounce than commercial airfloat. Therefore the mill dust produced with the pine charcoal occupies more space after it has been milled than commercial charcoal would.
But, we're shooting for a material charge that is approximately 25% of the jar's volume, and the 15/3/2 amounts that I listed above will be close enough, whatever charcoal one uses. If one is finicky, these amounts can be adjusted with experience and experimentation.
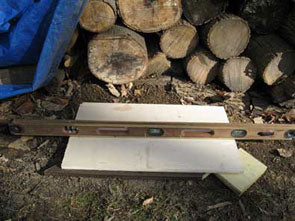
Once a nice, safe, remote location is determined, set up a level platform for your ball mill.
Remote and Level Location for Ball Mill
You can see in the photos that I have the mill at the end of an extension cord, on a timer, and nestled against a stack of firewood. I then surround the mill with bags of all-purpose sand that I've wrapped with heavy duty garbage bags and duct tape. I want my sandbags to withstand the weather and handling and last a long time.
Making Weather-Proof Sand Bags to Barricade the Ball Mill
Barricading and Tarping the Mill
Installing a tarp to protect the mill and timer from sudden inclement weather is a good idea.

"I'm Glad I Tarped That Baby"
I check my mill temperature now and then during mill runs. I remotely stop the mill (by disconnecting the power cord at the end away from the mill). Then I adjust the vent holes and lid accordingly to maintain a 70-120 degree F temperature in the cabinet. I do not want to overheat my motor and ruin it. I make notes in my notebook of the various air temperatures at which I do all of this so that in the future I can duplicate these adjustments.
Here’s what my notes look like:
Outside air temperature: 30 degrees F
Bottom vent holes in cabinet open, lid on tight.
Black powder mill run
Start of mill run, cabinet temperature: 30 degrees F
10 minutes into run, mill temp: 57 degrees F
20 minutes into run, mill temp: 64 degrees F
30 minutes: 73 degrees
40 minutes: 81 degrees
50 minutes: 90 degrees
60 min.: 95 degrees
70 min.: 105 degrees
80 min.: 108 degrees
90 min.: 114 degrees
110 min.: 117 degrees
I then stopped the mill remotely and uncovered it. The inside of the cabinet felt warm. The thermometer remote sensor had been placed down near the motor which felt pretty warm to the touch, but not so much that I would be worried about it being damaged.
Upon opening the jar, the mill dust was still loose and lying around the media and the dust was looking very fine and well milled. The media was only mildly warm to the touch, I’d guess in the 80-90 degree F range.
Conclusion: On a cold winter day like today, the configuration of the mill and the vents worked well. It got nice and warm, though, so I'll pay close attention to these readings on a hot summer day and adjust accordingly.
Keeping a notebook of info like this is very useful in the long run.
Of course, if one has a farm out in the country and can set up a tent or erect a shed to use for ball milling, and there is no danger of unsuspecting bystanders getting near it during milling, then the barricading may not be necessary.
Now, I can just hear some of you saying, "Jeez, all I want to do is make some homemade black powder and some stars and put a shell together and fire it. Do I really have to go to all this trouble? Aren't you being a bit finicky and paranoid, Ned?"
This ball mill, and the cabinet, and the sandbags, and the buckets I'm about to show you, and especially the efforts put forth to do all of this the right way all amount to an investment in an art which can reap rewards for a lifetime. There really is no substitute for preparing to perform these tasks safely. And you'll sleep better at night knowing you have done so. Do you want to hurt some little kid?
I have never had a mill explosion, and I do not know anyone who has. I have heard of them, though. All of this is cheap insurance just in case your next mill run is the one that explodes.
Coming back after the amount of time set on the timer, when she's stopped running, I uncover it all.
It's time to dump the contents. But, the media and the material are all mixed together. How can I separate them? The fastest way is to use bucket screens. Here's how you can make them.
After a mill run, the mill jar is opened and the contents are carefully poured into the separation bucket screen, which is resting in the receiving bucket. After placing a lid loosely on the top of the separation bucket, with a swirling motion the material is easily separated from the media. The separation bucket is then removed, the lid is put onto the bottom bucket which has the milled material in it, and the media is poured back into the jar.
Keep the material covered by the bucket lid until it is transferred to a storage bucket and lid. If it is a completed black powder composition, always minimize the amount of time it is exposed to any possible source of ignition.
Rather than trying to pour the media directly from the separation bucket back into the jar, it's easier to pour the media into a smaller, more pliable bucket. This smaller bucket’s mouth can then be bent into an oval for pouring the media back into the jar.
To keep from cracking the bottom of the PVC jar, tip the jar onto its edge, and pour the media back in slowly and carefully.

Pouring the Media Back into the Ball Mill Jar
Practice good housekeeping and maintenance with your mill. Clean up any spills immediately, and lubricate bearings as necessary. Tighten screws, nuts and bolts occasionally, and check the whole rig for wear and tear regularly.
You should never be near the mill when it is turned on, or when it's running, so there should be no danger of your shirt sleeve or ponytail getting caught in the moving rollers. Right? That is a directly driven drive shaft in there, so exercise appropriate caution around it.
Stay Green,
Ned
Materials Needed
Or, the directions say to ball mill my rocket fuel for an hour.
An article tells me to ball mill my star composition prior to pressing my stars.
Maybe I just got some crystalline potassium nitrate that looks like sugar, and I want to turn it into a fine, talc-like powder.
And, perhaps most of all, I want to be able to make commercial-quality, high-performance black powder.
In Volume 1 of Bill Ofca's Technique in Fire, he states that "small particle size is important to good chemical reaction. The smaller the particle size, the greater the specific area, hence the most complete and fastest reaction."
Except for very small batches, ball milling is the best way for the amateur fireworker to reduce particle size in their chemicals. With small batches of individual chemicals, some folks use electric coffee mills to grind the chemicals into fine powder. NEVER grind mixed compositions in a coffee grinder, though. To do so would be to court disaster.
The Ball Mill
Lloyd Sponenburgh, in his Ball Milling Theory and Practice for the Amateur Pyrotechnician, tells us his explorations into ball milling began when he was faced with having to do all that grinding with a mortar and pestle to achieve small particle size and intimately mix his chemicals. Lloyds's book is the most complete and practical resource I know for information on ball milling theory and for plans to actually build your own ball mill. Here's a shot of a nice, double-barrel mill I built based on his principles.Homemade Double-Barrel Ball Mill
Ball milling replaces potentially unsafe hand grinding of chemicals and compositions. The crushing of the material is accomplished by the repeated falling of heavy balls onto it, over and over, inside the mill jar.
So, it sounds like I need a ball mill. I want my chemicals to have small particle size and be intimately mixed. What are my choices?
I can either get Lloyd's book and build my own ball mill, or I can purchase one. (I'd still recommend getting the book for all of the other valuable milling information contained in it, though.)
Skylighter sells a nice ball mill which comes with a mill jar. All you have to do is add milling media. More on that in just a minute.
I’m also including how-to info for a few other milling accessories that will increase your milling productivity. You can make this yourself: a bucket screen to separate your milled powders from the media; a simple little soundproof cabinet to put your mill in: and weatherproof sandbags for safely barricading the mill.
Here's a ball mill you could get here at Skylighter. This size jar is typically referred to as a 'one gallon jar' because its volume is, indeed, one gallon.
Skylighter's Ball Mill
This jar is constructed of PVC plumbing pipe and fittings per Lloyd’s original instructions.
How many jars or barrels do I need? If one is milling only black powder ("BP") compositions, or the individual chemicals that make them up (potassium nitrate, sulfur, charcoal, dextrin), then only one barrel is necessary.
If I am milling some other chemicals by themselves such as barium nitrate, strontium nitrate, or ammonium perchlorate, then I want a barrel/media combination dedicated to each of those individual chemicals. This prevents cross-contamination between the various chemicals that are milled.
Black powder compositions are the only mixed chemical compositions I mill, and they are never milled with any metals in them. If, say, a charcoal star formula calls for the inclusion of any metal, such as ferro-titanium or titanium, the metal is added to the black powder base composition after it is milled.
The Media
The ball mill consists of the mill base and the mill jar. There's one more important component to a ball mill, though: the media. The balls of heavy material which fall upon and crush the chemicals are called the milling media. Here's the media I bought to use in this mill. I got the packages of lead balls from my local gun shop, which sells them as muzzle loading bullets. They can also be purchased online.Ball Milling Media - .50 Caliber Lead Balls
It took 12 boxes of these 1/2" diameter lead balls (from Bass Pro) to fill the mill jar half full, which is the ideal media "charge" in this1-gallon jar setup. The total weight of the media is 30 pounds.
That is an important note: Fill the mill jar half full of media for optimal milling. If you use less, your milling time will either be longer, or the grinding will be insufficient. The most frequently reported milling problem we hear at Skylighter is from people whose black powder was weak because they did not use enough media.
After I got these lead balls, I ran the mill with them in the jar along with 4 cups of airfloat charcoal I had on hand. This was in order to clean off the oil, grease, and/or wax that came coated on the new balls. Then I threw that batch of charcoal out. I did not want that "crud" to end up in any good chemicals or BP that I milled.
Milling Media Cautions
Each type of media has its advantages and disadvantages.
Learn More About Milling Media Pro's and Cons, and How to Stay Safe...
Each type of media has its advantages and disadvantages.
Learn More About Milling Media Pro's and Cons, and How to Stay Safe...
The Material Charge
Well, now we have a mill base, a mill jar, and the media to go into it. How much material can we put into the jar, and how can we get started grinding it?"Well, Ned, we just fill the jar the rest of the way with chemicals on top of the media and turn her on, right?"
"Nope," said Ned.
For efficient milling, the ideal amount of stuff we are grinding, the "material charge," is just enough to fill all the voids between the media and then just a little bit more. This turns out to be an amount of material that fills the empty mill jar 25%, or 1/4 of the volume of the mill jar, after the material has been milled.
Now, in practicality this can be a bit hard to determine. How do I know how much lump charcoal to add to the jar to end up with enough airfloat charcoal to fill one quarter of the jar? How can I tell how much potassium nitrate, charcoal, and sulfur will mill into just the right amount of black powder mill dust?
Trial and error, that's how. I have found that if I put my media in the jar and then add enough of my cooked and crushed lump charcoal to just loosely fill the jar the rest of the way, I will end up with about the right amount of airfloat to fill the voids in the media and cover it by a bit more when the run is done.
It's easy enough to take your empty mill jar and add individual cups of water to it to determine its volume. Then divide that by 4 and that's the amount of, say, potassium nitrate to add to a mill jar run to finely pulverize it. You get the idea. The jar and barrel shown above both have a one-gallon volume which is 16 kitchen measuring cups. So, a milled material charge of 4 cups in volume is what we are shootin' for.
In making black powder, I've found that a material charge of 15 ounces of potassium nitrate, 3 ounces of airfloat charcoal, and 2 ounces of sulfur produces the most efficient quantity of BP mill dust.
The density of the mill dust, and therefore the volume it occupies, will vary a bit with the density of the charcoal used. Pine charcoal is quite a bit less dense, occupying more volume per ounce than commercial airfloat. Therefore the mill dust produced with the pine charcoal occupies more space after it has been milled than commercial charcoal would.
But, we're shooting for a material charge that is approximately 25% of the jar's volume, and the 15/3/2 amounts that I listed above will be close enough, whatever charcoal one uses. If one is finicky, these amounts can be adjusted with experience and experimentation.
A Ball Mill Cabinet for Soundproofing
Ball milling can be noisy, especially when PVC jars are used. Those balls clattering around in the jar, over and over, for hours, can get on one’s last nerve, even though the mill is a hundred feet away.
Learn How to Build a Ball Mill Cabinet for Soundproofing...
Ball milling can be noisy, especially when PVC jars are used. Those balls clattering around in the jar, over and over, for hours, can get on one’s last nerve, even though the mill is a hundred feet away.
Learn How to Build a Ball Mill Cabinet for Soundproofing...
Locating the Ball Mill for Safety
Ball mills are noisy. And there is always the risk of explosion when BP comps are being milled. For these reasons, a remote milling site which is protected from people and property is necessary. Starting the mill remotely, either by plugging in a 100’ extension cord that runs to it, or by setting the mill time on a timer, prevents you from standing next to it while it is running. (Notice the timer in the photo of my double-barrel mill and in the photo below.)Once a nice, safe, remote location is determined, set up a level platform for your ball mill.
 |
 |
Barricading the Ball Mill
I've mentioned that a mill explosion is always a possibility when complete black powder compositions are being ball milled. So, try and place your mill behind a natural barricade like a mound of earth, a rock, or a big tree. If you can't do that, barricading the ball mill with sandbags, stacks of firewood, 5 gallon buckets of water or dirt, or something similar is a great idea. This barricade will absorb the energy and flying debris in the event of an accidental explosion.You can see in the photos that I have the mill at the end of an extension cord, on a timer, and nestled against a stack of firewood. I then surround the mill with bags of all-purpose sand that I've wrapped with heavy duty garbage bags and duct tape. I want my sandbags to withstand the weather and handling and last a long time.
 |
 |
 |
 |
Installing a tarp to protect the mill and timer from sudden inclement weather is a good idea.
"I'm Glad I Tarped That Baby"
I check my mill temperature now and then during mill runs. I remotely stop the mill (by disconnecting the power cord at the end away from the mill). Then I adjust the vent holes and lid accordingly to maintain a 70-120 degree F temperature in the cabinet. I do not want to overheat my motor and ruin it. I make notes in my notebook of the various air temperatures at which I do all of this so that in the future I can duplicate these adjustments.
Here’s what my notes look like:
Outside air temperature: 30 degrees F
Bottom vent holes in cabinet open, lid on tight.
Black powder mill run
Start of mill run, cabinet temperature: 30 degrees F
10 minutes into run, mill temp: 57 degrees F
20 minutes into run, mill temp: 64 degrees F
30 minutes: 73 degrees
40 minutes: 81 degrees
50 minutes: 90 degrees
60 min.: 95 degrees
70 min.: 105 degrees
80 min.: 108 degrees
90 min.: 114 degrees
110 min.: 117 degrees
I then stopped the mill remotely and uncovered it. The inside of the cabinet felt warm. The thermometer remote sensor had been placed down near the motor which felt pretty warm to the touch, but not so much that I would be worried about it being damaged.
Upon opening the jar, the mill dust was still loose and lying around the media and the dust was looking very fine and well milled. The media was only mildly warm to the touch, I’d guess in the 80-90 degree F range.
Conclusion: On a cold winter day like today, the configuration of the mill and the vents worked well. It got nice and warm, though, so I'll pay close attention to these readings on a hot summer day and adjust accordingly.
Keeping a notebook of info like this is very useful in the long run.
Of course, if one has a farm out in the country and can set up a tent or erect a shed to use for ball milling, and there is no danger of unsuspecting bystanders getting near it during milling, then the barricading may not be necessary.
Now, I can just hear some of you saying, "Jeez, all I want to do is make some homemade black powder and some stars and put a shell together and fire it. Do I really have to go to all this trouble? Aren't you being a bit finicky and paranoid, Ned?"
This ball mill, and the cabinet, and the sandbags, and the buckets I'm about to show you, and especially the efforts put forth to do all of this the right way all amount to an investment in an art which can reap rewards for a lifetime. There really is no substitute for preparing to perform these tasks safely. And you'll sleep better at night knowing you have done so. Do you want to hurt some little kid?
I have never had a mill explosion, and I do not know anyone who has. I have heard of them, though. All of this is cheap insurance just in case your next mill run is the one that explodes.
The Mill Run
The jar is charged with media and material. The mill is set up and barricaded. The timer is set for the duration of the mill run. My thermometer is up and running. I plug my 100-foot extension cord into the mill, then go back to the house and plug that end in, and let 'er rip.Coming back after the amount of time set on the timer, when she's stopped running, I uncover it all.
It's time to dump the contents. But, the media and the material are all mixed together. How can I separate them? The fastest way is to use bucket screens. Here's how you can make them.
How to Make a Bucket Screen for Separating Media and Material
Here are the plans for a really useful addition to one's milling arsenal, a separating bucket-screen.
Learn How to Make a Bucket Screen for Separating Media and Material...
Here are the plans for a really useful addition to one's milling arsenal, a separating bucket-screen.
Learn How to Make a Bucket Screen for Separating Media and Material...
Separating Media and Material
Note: Even a cloud of charcoal dust can create an explosion if it is ignited. Do the following step outdoors away from sources of ignition, while wearing a good dust mask/respirator.After a mill run, the mill jar is opened and the contents are carefully poured into the separation bucket screen, which is resting in the receiving bucket. After placing a lid loosely on the top of the separation bucket, with a swirling motion the material is easily separated from the media. The separation bucket is then removed, the lid is put onto the bottom bucket which has the milled material in it, and the media is poured back into the jar.
Keep the material covered by the bucket lid until it is transferred to a storage bucket and lid. If it is a completed black powder composition, always minimize the amount of time it is exposed to any possible source of ignition.
Rather than trying to pour the media directly from the separation bucket back into the jar, it's easier to pour the media into a smaller, more pliable bucket. This smaller bucket’s mouth can then be bent into an oval for pouring the media back into the jar.
To keep from cracking the bottom of the PVC jar, tip the jar onto its edge, and pour the media back in slowly and carefully.
Pouring the Media Back into the Ball Mill Jar
Practice good housekeeping and maintenance with your mill. Clean up any spills immediately, and lubricate bearings as necessary. Tighten screws, nuts and bolts occasionally, and check the whole rig for wear and tear regularly.
You should never be near the mill when it is turned on, or when it's running, so there should be no danger of your shirt sleeve or ponytail getting caught in the moving rollers. Right? That is a directly driven drive shaft in there, so exercise appropriate caution around it.
Summary
So, we've covered ball milling, including:- What purposes are served by milling.
- What can and cannot be milled.
- The mill base, jar, media, and material charge.
- A cabinet for the mill.
- Locating and barricading the mill and general mill safety.
- Monitoring the mill's temperature during milling.
- Mill run times.
- A nice separation screen for separating the media from the material.
Stay Green,
Ned
Materials Needed
- Ball Mill (TL5005)
- Ball Mill Cabinet
- Barricading Material
- Material to Mill
- Milling Media (TL5017)
- Tarp